Please be aware that there is no way that I could come up with this idea on my own, I am in no way vaguely creative enough to have these kinds of ideas by myself. This is all the work of one of The Stitchettes, who showed us how to do this last year and sat with me, telling me what to do.
So first of all you need some wreaths like so;

This guy has a diameter of about 20cm/8ins. You can find them online at gardening websites and the like. They can sometimes be kind of pricey - the good thing about having fellow Stitchettes is that you can buy in bulk, which makes it cheaper, and then split the cost. Hurrah.
You also need fabric. Christmassy fabric, if that floats your boat. But any kind of fabric will do.

I've been getting mine from Doughty's which is a brilliant website. You can get fabric by the fat quarter, which is useful if you're trying to save pennies, and they are very quick at getting your fabric sent out to you and if there's something you've ordered that they don't have, they'll call you right away with other suggestions or refund you your money straight away.
You then need to cut your fabric into strips. The beauty about this is that you don't have to be super precise with your cutting, everything's cool, everything's all a bit rough and ready.

For a ring that size I used 4 fat quarters. Those of you who are maths whizzes will have astutely observed that that is 1m of fabric. These guys are approximately 3cm/1in by 15.5cm/6in.
(And speaking of Doughty's they sell Christmas themed fat quarter packs which include 8 fat quarters for £10.99)
And then you just start tying them to the wreath. Fold each strip lengthways in half and then knot it. Easy peasy right?

Now. Beware. When you start this endeavour, you will go through a period where you want to cry and you will sit there going "It looks rubbish! It's no good, it's not working!" Believe me I went through it and had to be cajoled and encouraged by my Stitchettes to stick with it and eventually it would reveal itself to be awesome.
And they're right, you have to keep going and most importantly, keep bunching your strips up together. Now you might think that everything is good and everything is placed nicely but trust me those strips are minxy. You will think that you've filled one section of your ring and then you squish them up and suddenly you realise that actually you've only filled half of one section of your ring.
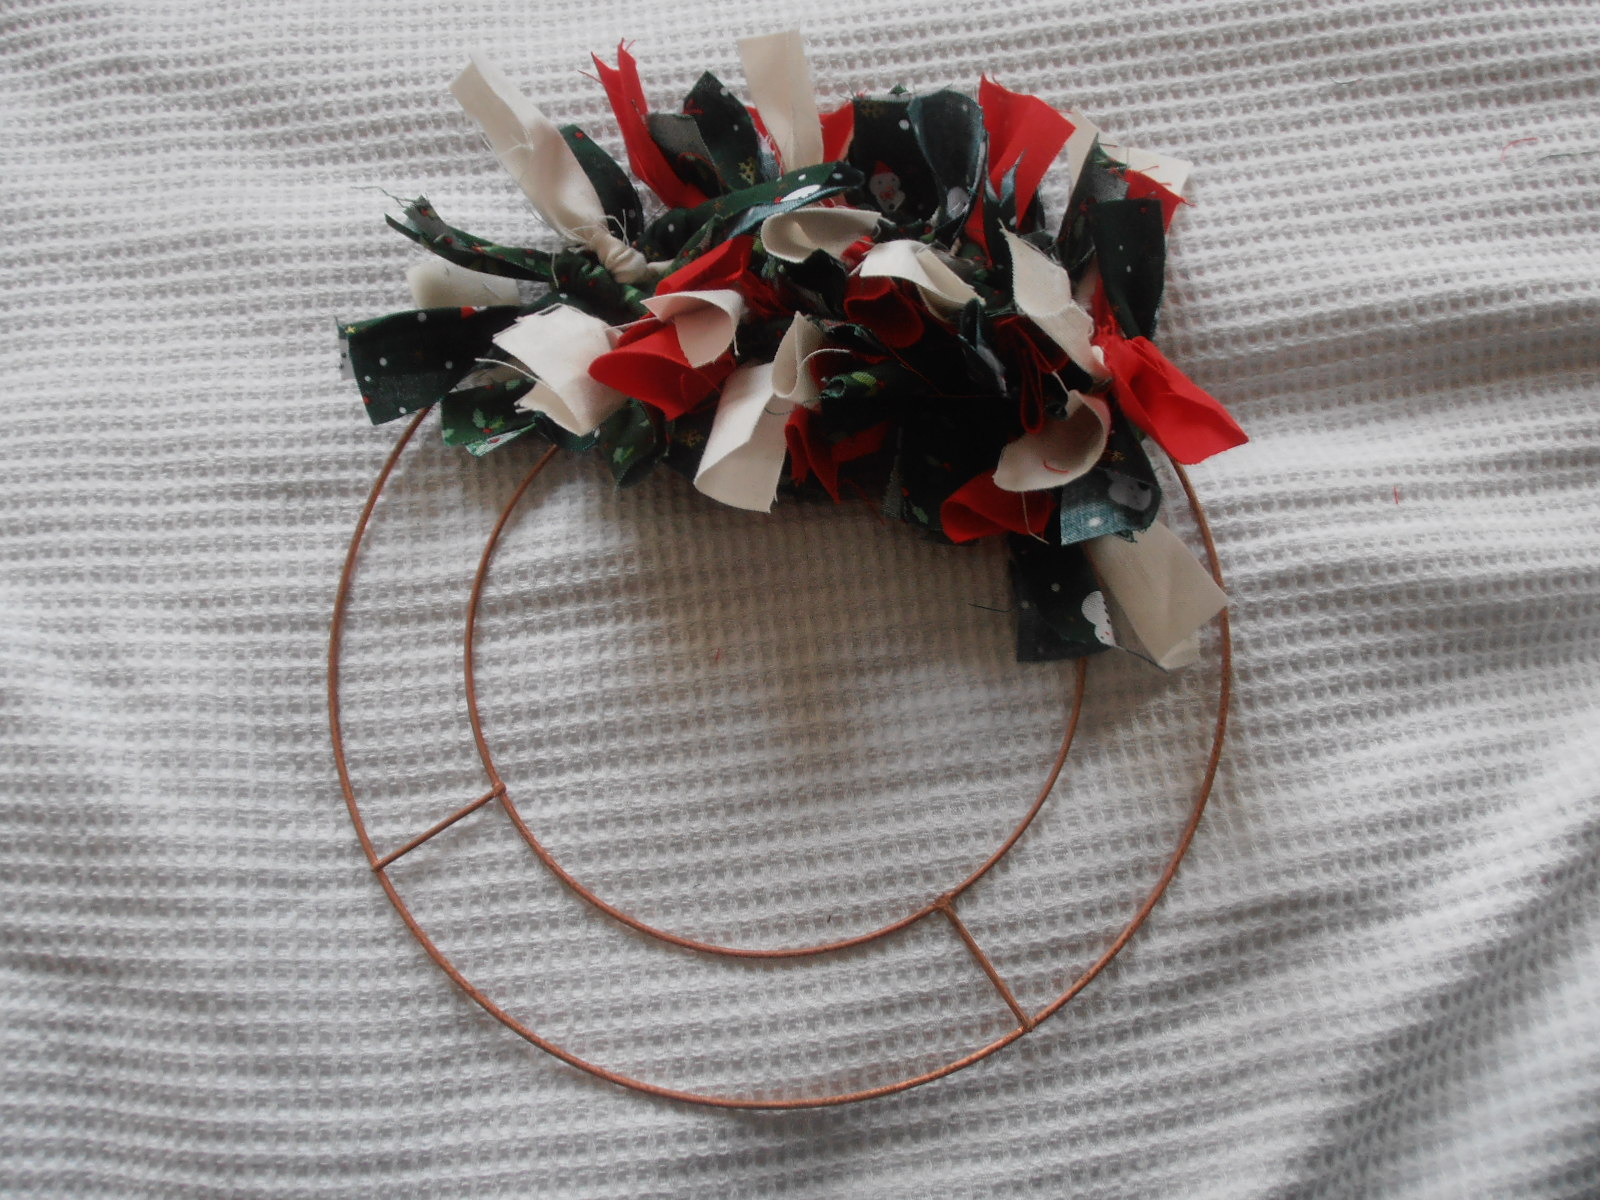
So you keep going and you keep going and you keep squishing and you fluff and primp and preen it as you go along and you will end up with a fluffy side, with the other side of it much flatter and you will keep going and going and then suddenly, 2.5 hours later*, you will have one finished wreath. (And I actually had a few strips spare.)

Then you just need to get some ribbon to tie round it and you're done. (I still need to buy some ribbon so you'll just have to use your imagination.)
These are the easiest gifts ever to make and work out not too expensive as long as you get a good deal on your fabric and your wreaths. These wreaths work out at about £5/6 each. Obviously not taking your labour into account - because when do you ever when you make home-made gifts?

And what I love is that each wreath is different. No 2 will ever be the same and just a slight change in fabric will make the wreath look totally different. This guy is much lighter, thanks to the cream fabric, but the last wreath I made was much more traditional looking thanks to the golden tones in some of the fabrics which made the overall effect much darker.

So I guess you'd better get making. Go on. Less blog reading, more wreath making.
*I kind of timed it and this was how long it took to make from cutting up the fabric to finishing the fluffing and taking photos. Don't blame me if you're a slow coach.
Great idea and it would make an awesome present.
ReplyDeleteI love a good wreath, I do!
ReplyDeleteGreat job...lovely result...I imagine you are tying the ribbon around both the wire rings? Being me (pernickety so&so) I would have to cut each ribbon end at a slant...might help stop fraying too...but that's just me. If I had time I'd do one...thanks for the web site for good value.
ReplyDeleteBeautiful! I'd love to try it! I don't quite get how you did that scrimpy-tucking thing?
ReplyDeleteThis is great!!
ReplyDeleteLove it lots!!!
I think I would love to make it if someone had prepared and arranged all the *ingredients* for me, but I'm feeling super lazy right now, and not sure if I'll get to making it myself this year, but for sure next year!
Thanks for sharing it- it's awesome!!
Hmmm, I have some Christmassy fabric from the Hobbycraft January Sale ... I was going to use it for bunting but might give one of these a go instead... :) xx
ReplyDeleteWoah, I had no idea it was so straightforward. They look amazing when they're finished so I assumed it would take hours.
ReplyDeleteI'm so doing this. If not this year definitely definitely next year!
ReplyDeleteLOOKIN GOOD! I once made a wreath like this but as a child with white bin bags and a coat hanger in the US...it was fun and I was pretty proud of the result at the time! Cloth would be better of course - the thing got very shabby after a while! xxx
ReplyDeleteOoooooooooooh I have some oth those metal rings - will make some up for christmas Eve, thanks so much - came here via Lucy.
ReplyDelete